Trimix analyser readings to Niimbot labels
Trimix Analyser Connector
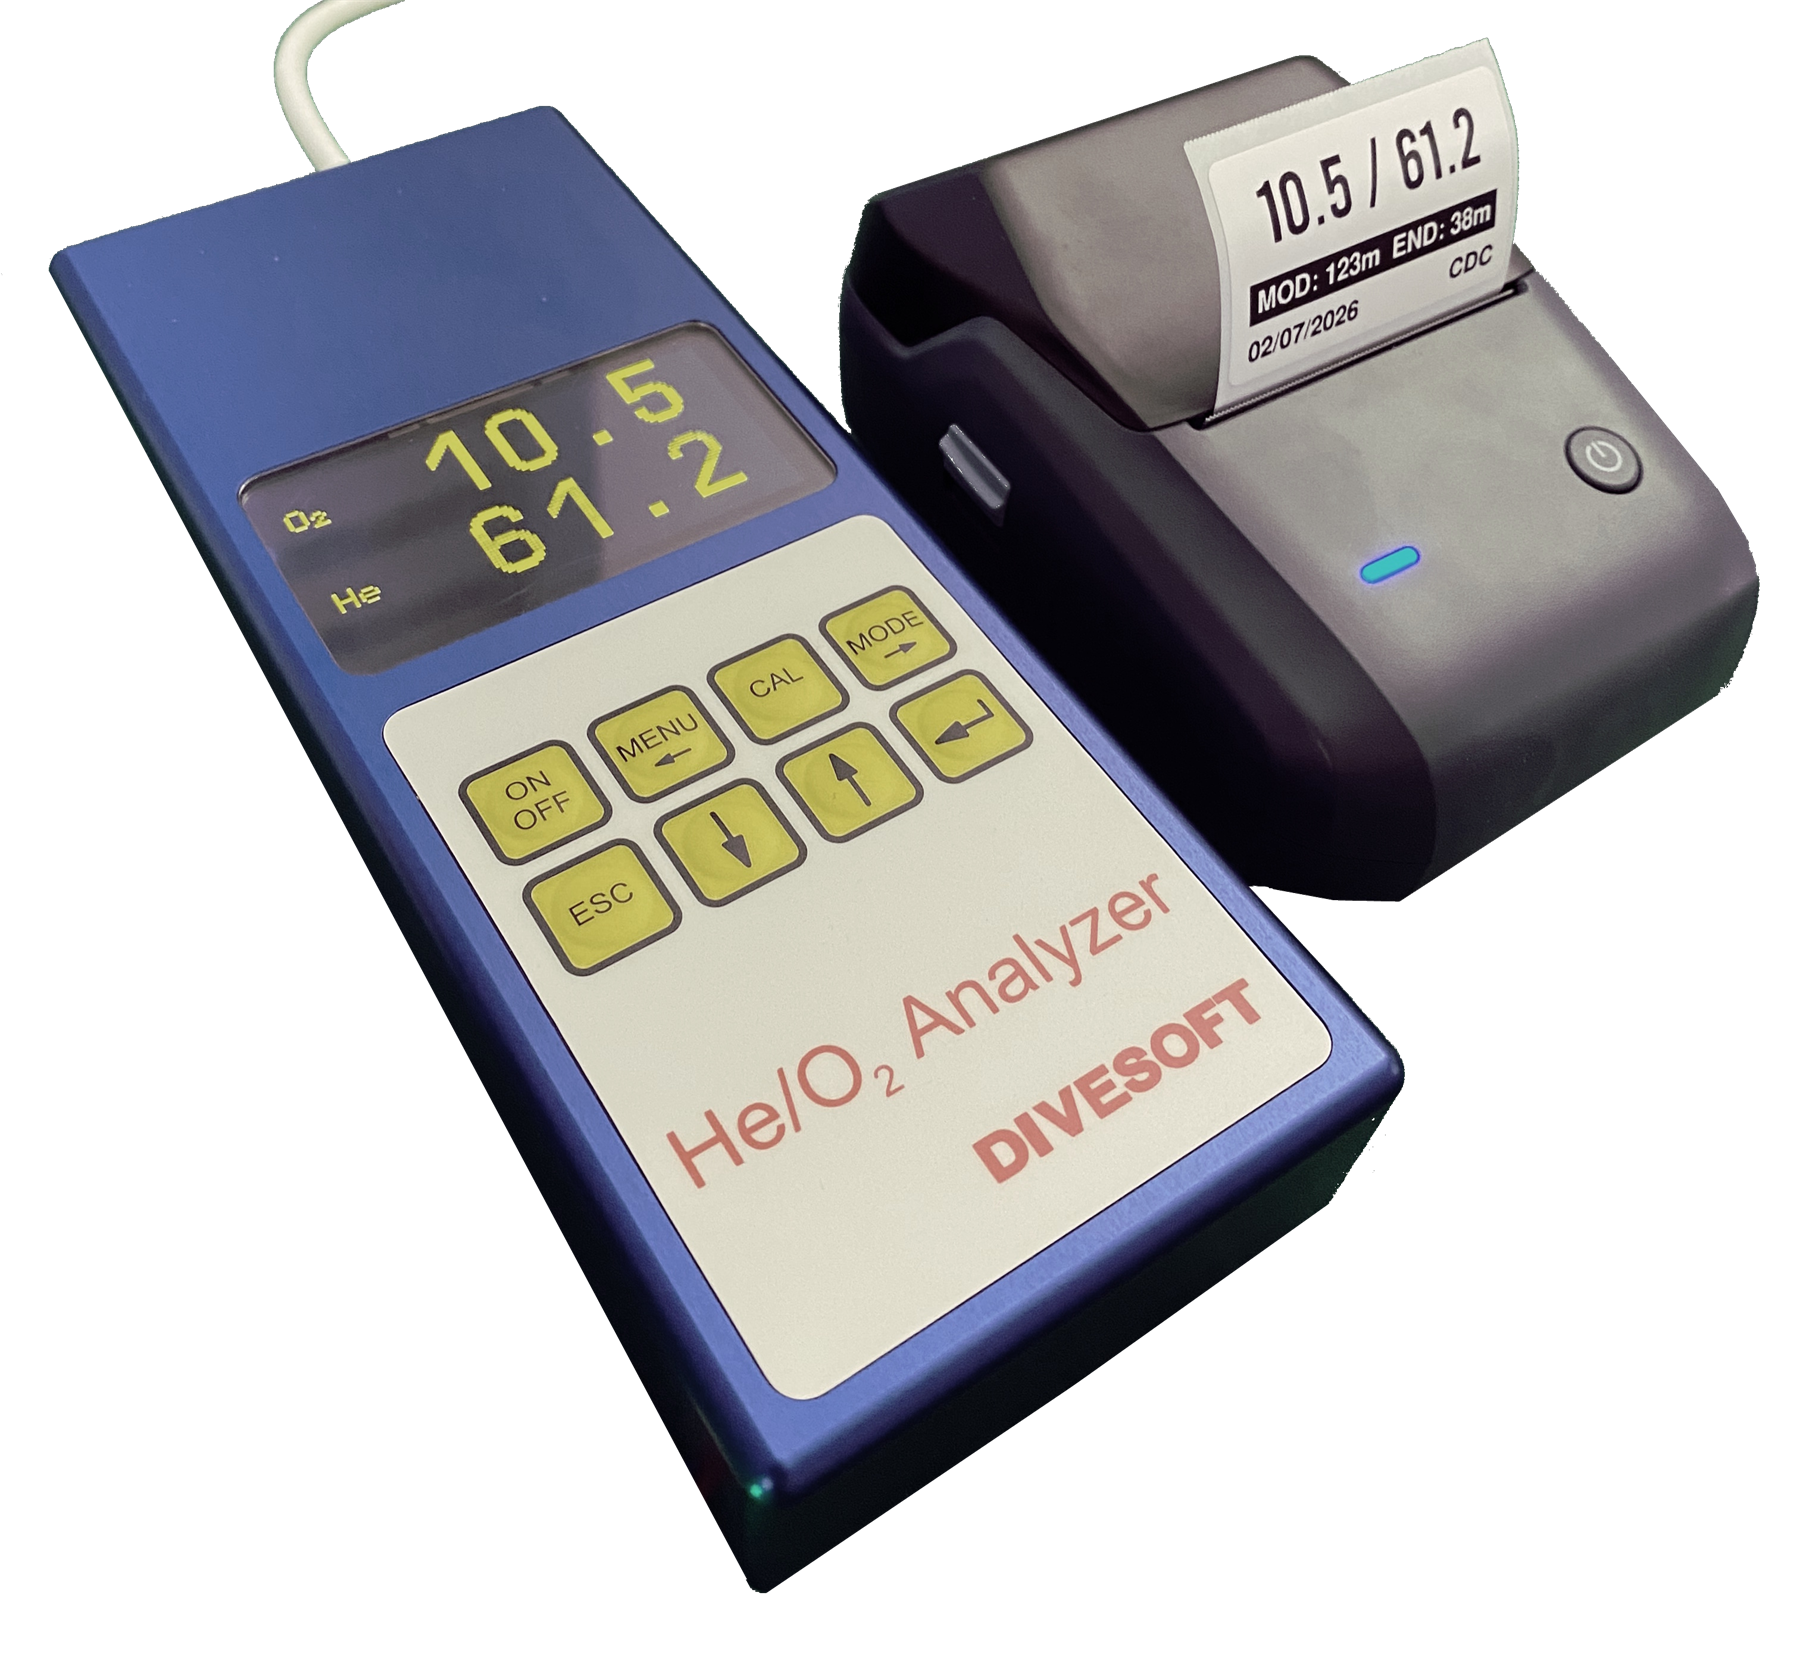
Big dives mean lots of cylinders to analyse, check, mark, and hand around. Handwritten tape can get messy fast, especially when everyone is prepping at once. This independent ESP32-S3-Zero adapter connects a Divesoft Trimix analyser to a supported Niimbot Bluetooth printer, so clear analysis labels come straight out of the workflow.
Nitrox-style labels are free. Helium and Trimix label printing is a Pro feature. The public installer and Pro checkout open in a few days after the final release firmware and production payment keys are verified.
Release notice
Launching in a few days!
Get an email when the Trimix Analyser Connector release is ready. The adapter firmware, public installer, production checkout, and Trimix Pro activation flow are being kept closed while the final build is verified. Sign up here and I will send a short release email when it is ready to install.
- No flashing or Pro purchase is needed yet.
- The launch email will include firmware, wiring, printer, and activation notes.
- Your address is used only for this release notification.
Never flash while connected to the analyser
Before flashing or updating the Trimix Analyser Connector, disconnect it completely from the Divesoft Trimix analyser. Flash only with USB connected to the ESP32-S3-Zero. Leaving the analyser wiring connected during flashing can backfeed or short signals and may destroy circuits in the adapter or analyser.
Before you expect live readings: enable analyser data output.
On the Divesoft analyser select Menu > Preferences > Send Data to USB > On. Some versions call this Data output. This is required even when the adapter powers on correctly. See the official Divesoft He/O2 manual, section 12 “Connecting to a computer”.
Simple external dongle
Plug in the dongle. No opening, no analyser modification.
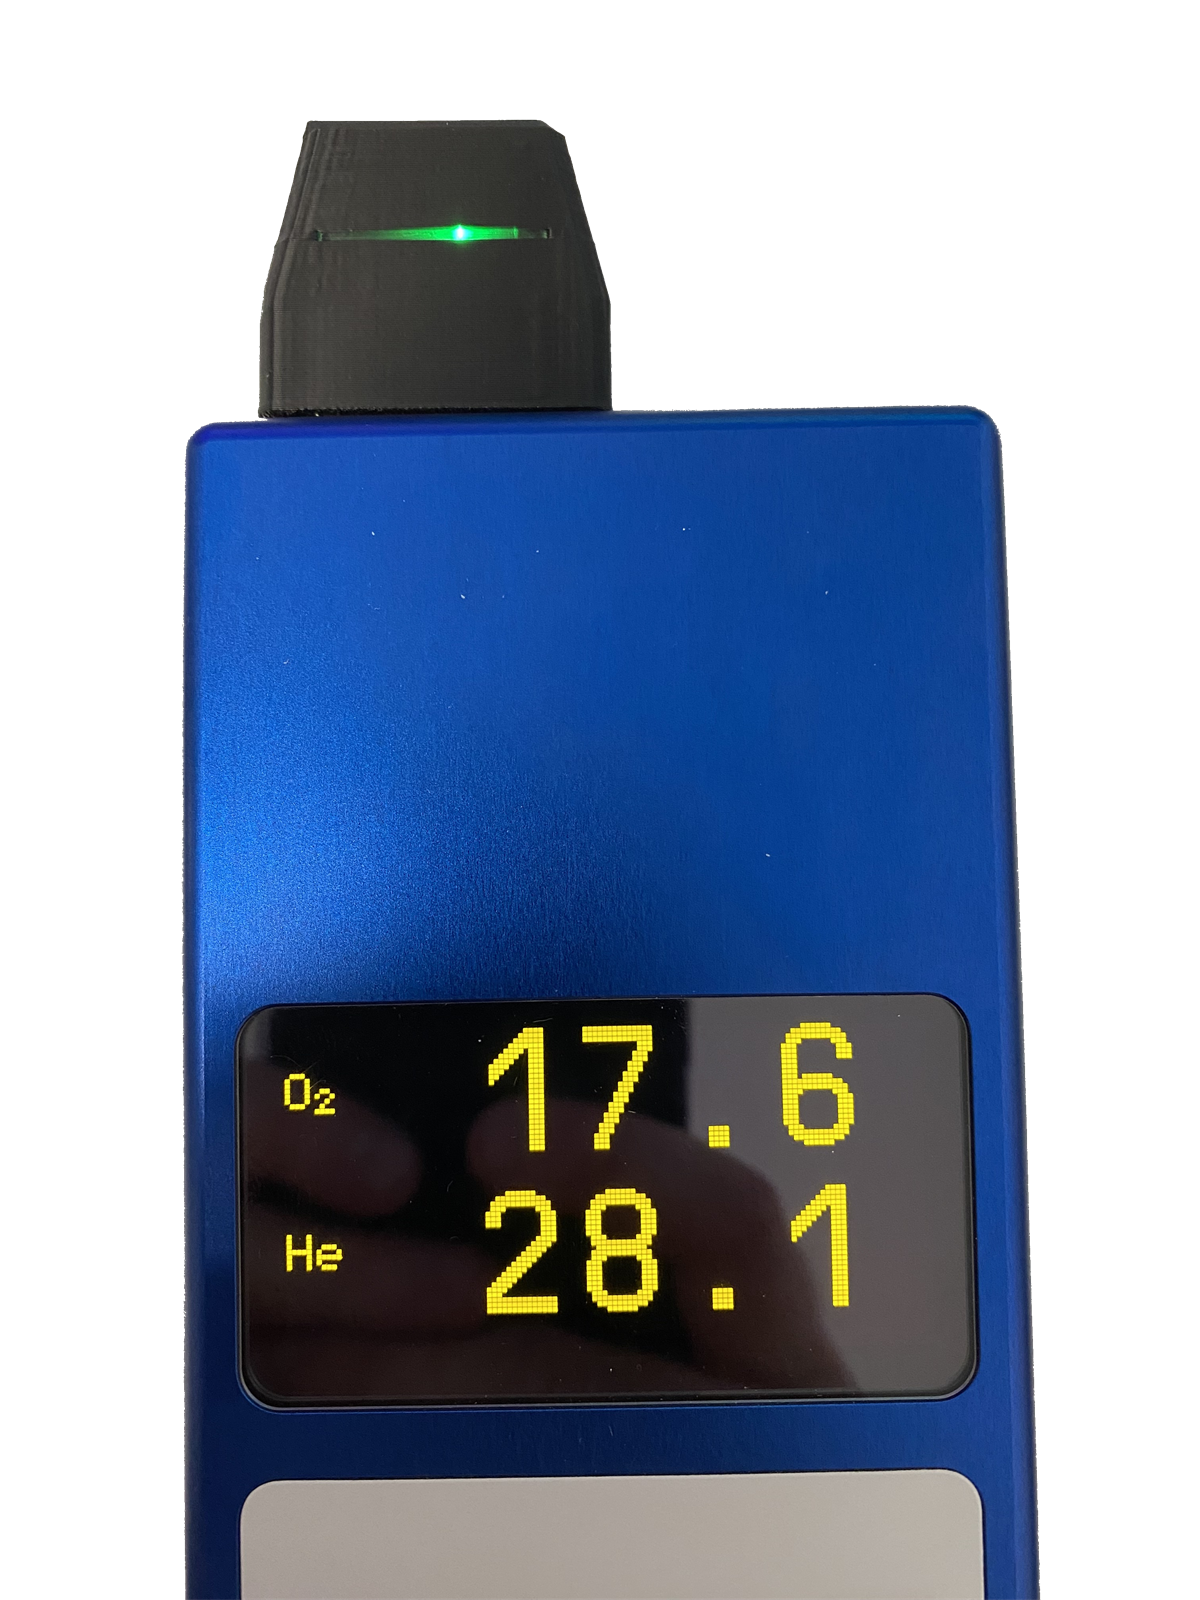
The adapter is a small external dongle for the Divesoft Trimix analyser data port. Plug it into the documented connector and it listens to the analyser output while the analyser remains the source of truth for the measurement.
You do not need to open the analyser, solder inside it, or change its electronics. Make the external cable, plug in the adapter, pair it to the printer, and keep the original analyser workflow intact.
- Uses the existing analyser data port documented by Divesoft.
- The analyser display stays the check point before anything is printed.
- The adapter is removable, updateable, and independent from the analyser hardware.
- WiFi setup, printer pairing, owners, history, logs, and OTA stay in the Web UI.
One-button mobile printing
Press once and get a clean, readable cylinder label.
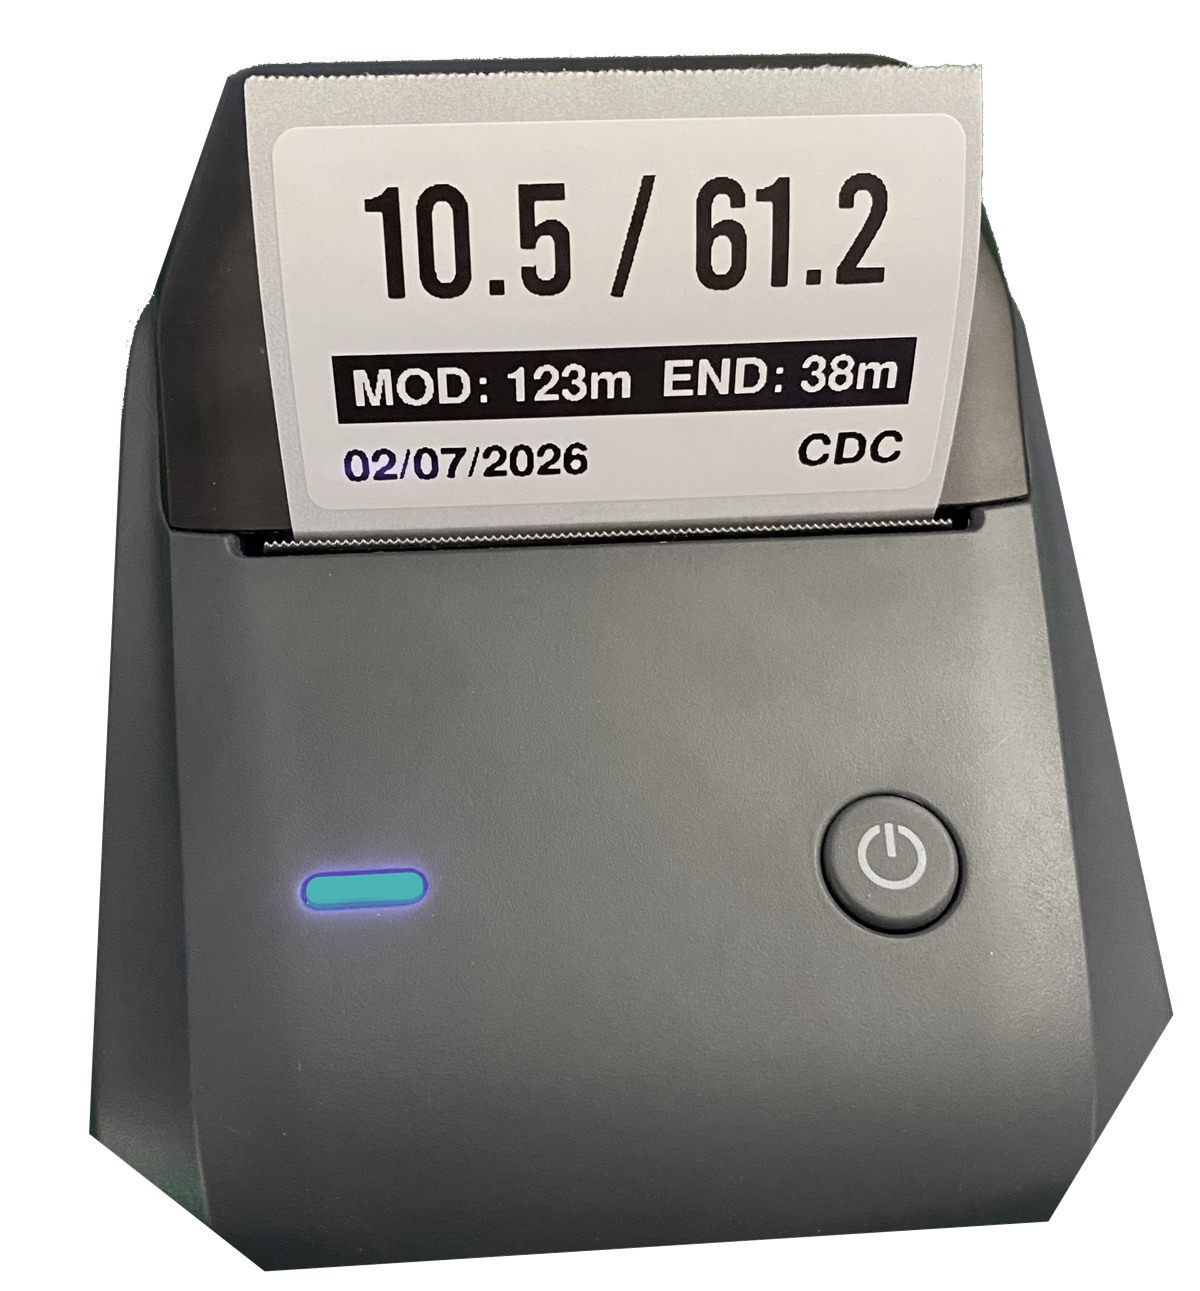
When the reading has been checked on the analyser, press the adapter button and the finished label is sent to the paired battery-powered Niimbot printer. No phone, laptop, or handwriting step has to be added while the team is already busy analysing cylinders.
The label is printed clearly for fast checking at the fill station or dive site: mix first, then MOD, END, date, and owner initials. No more decoding rushed handwriting or half-readable tape labels when several cylinders are being prepared at once.
- Single button press after the displayed values have been checked.
- Battery-powered mobile printer for bench, boat, van, or dive-site use.
- Trimix labels include oxygen, helium, MOD, END, date, and owner initials.
- Basic Nitrox label printing is available without the Trimix Pro upgrade.
Device Web UI
Set up WiFi, pair the printer, manage Pro, and check live readings.
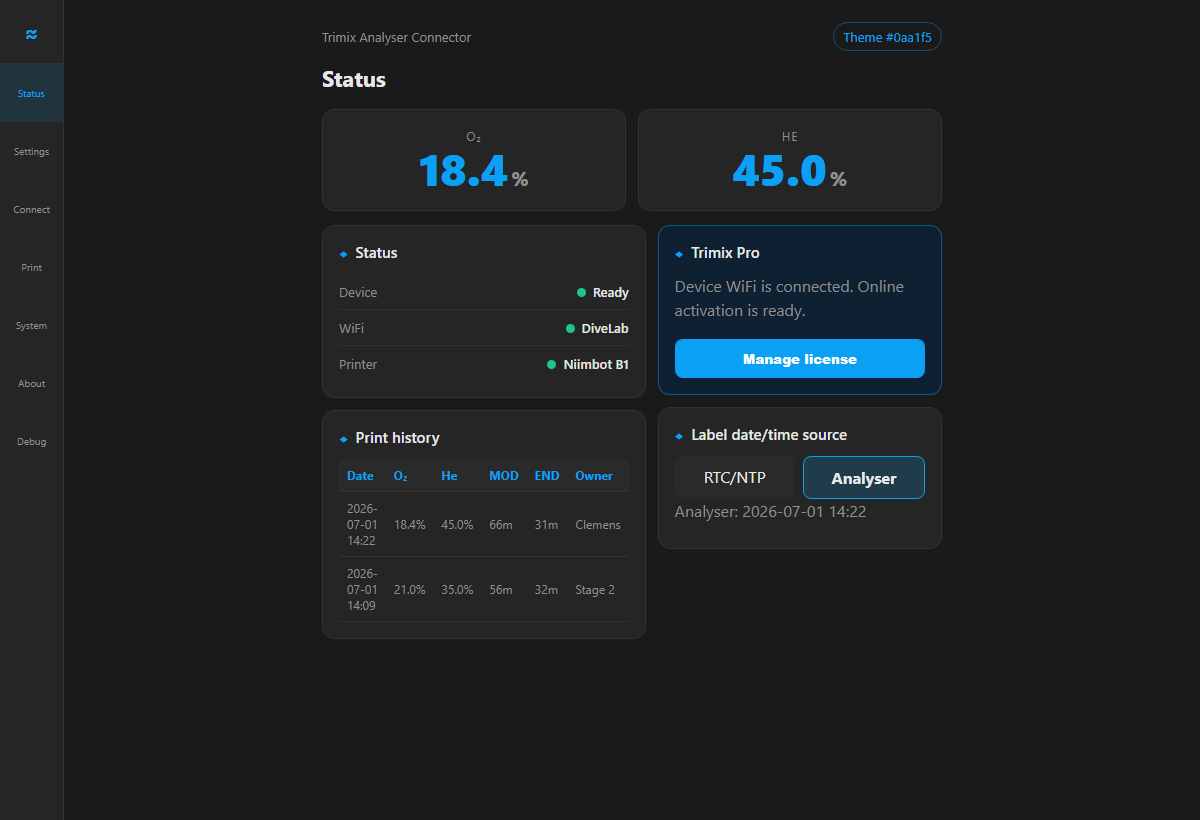
The connector has its own local Web UI with the same blue theme as this site. Use it for printer setup, WiFi, owners, print history, label date/time source, OTA updates, diagnostics, and Trimix Pro activation.
- Connect device WiFi before online Pro activation.
- Signed entitlements remain offline-capable after setup.
- Live O2 and He values make it easy to verify what the adapter receives.
Shopping list
Parts for the Trimix Analyser Connector
We provide firmware and the installer. You source the electronics, make the Divesoft cable, flash the board from the website, pair your printer, and verify the first labels carefully. You do not need to compile code or install developer tools.
| Qty | Part | Purpose |
|---|---|---|
| 1 | Waveshare ESP32-S3-Zero | Main ESP32-S3 board with USB-C. Buy the bare board without fitted pin headers and without a housing so it fits the printed enclosure. |
| Optional | Optional momentary push button | Optional manual print trigger; normally the analyser pause button triggers printing. |
| Optional | DS3231 Mini RTC module | Only needed for older Divesoft analyser models that do not provide a built-in clock in the serial output. |
| 1 | Short insulated hookup wires / cable | Connect TXD, ground, optional switched 5V, and optional print button wiring. |
| 1 | Male DVI connector with solder pins/pads | Plugs into the analyser rear connector; solder TXD, GND, and switched 5V to the pads. |
| 1 | Printed housing set | Holds the ESP32 board, DVI connector, and optional print button. The housing file and a printed-order option will be published here. |
| 2 | M2.5 × 6 mm flat-head screws | Close the printed housing. |
| Optional | Niimbot B1/B21 printer | Bluetooth label output. |
Tools
What you need on the bench
Soldering iron, multimeter, wire cutters, USB-C cable, printed housing, and two M2.5 × 6 mm flat-head screws.
Skill level
No coding experience required
Flash via the website, solder the DVI connector and button, pair the printer, then verify every printed label.
Build kits
Would you be interested in a build kit?
We are currently exploring offering build kits: the ESP32-S3-Zero board, DVI connector, optional print button, wiring, printed housing, and two M2.5 × 6 mm flat-head screws in one package, so you only solder and assemble. Before we commit to kits, we would like to hear your feedback first.
- This is research only; nothing is for sale here and there is no commitment.
- Tell us what a kit should include and what it would be worth to you.
- Email is optional and only used if you want to be contacted about kits.
Assembly and soldering
Trimix Analyser Connector pinout
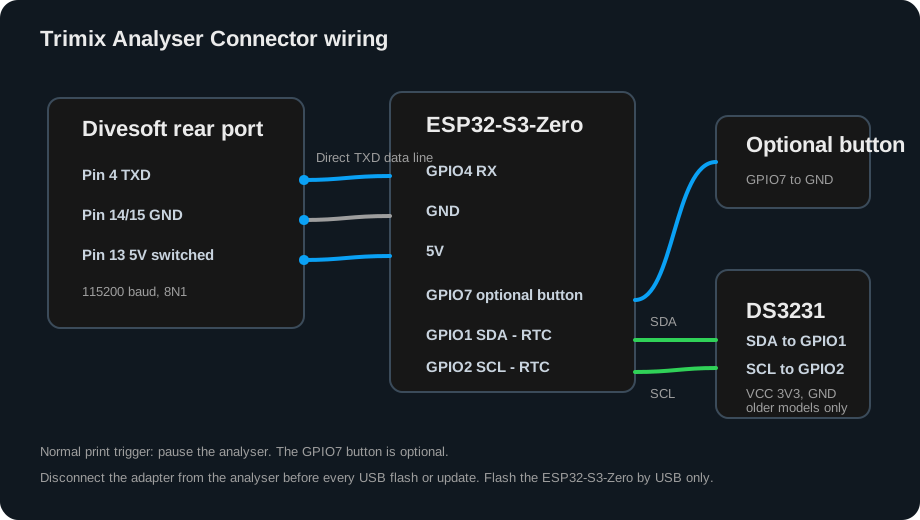
This uses the Divesoft rear connector serial output documented for the analyser. It only listens to the analyser TXD line and sends label data to the Niimbot printer over Bluetooth. Before live testing, enable Menu > Preferences > Send Data to USB > On (also called Data output on some versions). Disconnect the adapter from the analyser before every USB flash or update.
| Connection | ESP32-S3-Zero pin | What to solder |
|---|---|---|
| Divesoft TXD | GPIO4 RX | Divesoft rear connector pin 4 directly to ESP32 GPIO4 RX. Do not add a single series resistor in this data line. |
| Divesoft GND | GND | Divesoft rear connector pin 14 or 15 to ESP32 ground. |
| Divesoft 5V | 5V | Optional power from rear connector pin 13, switched by the analyser power state. |
| Optional print button | GPIO7 and GND | Optional momentary push button to ground; firmware uses the internal pull-up. Normally use the Divesoft analyser pause button to trigger printing. |
| Optional RTC SDA | GPIO1 SDA | DS3231 SDA, only for older analyser models without a built-in clock. |
| Optional RTC SCL | GPIO2 SCL | DS3231 SCL, only for older analyser models without a built-in clock. |
| Optional RTC power | 3.3V and GND | Power the DS3231 from 3.3V, not 5V. |
- The ESP32 receives on GPIO4 only; GPIO5 TX is configured but not used by the adapter wiring.
- Required for live readings: enable
Menu > Preferences > Send Data to USB > On(or Data output). See the official Divesoft He/O2 manual, section 12. - The Divesoft TXD line is expected to be a direct 3.3V TTL serial connection; share ground with the analyser.
- If a different cable or analyser output measures above 3.3V, use a proper level shifter or calculated voltage divider, not a single series resistor.
- Measure the DVI solder-pad pins before final assembly.
Wiring diagram
Listen to the documented analyser connector port.
The adapter receives serial data directly from the analyser TXD line and shares ground with the analyser. Do not add a single resistor in the data line for normal Divesoft wiring. Unplug the adapter from the analyser before every USB flash or update so USB power cannot backfeed the analyser connector.
Printed housing
Printed enclosure for the adapter.
Print the housing when the file is published, or order a printed housing when that option opens. Fit the electronics and close it with two M2.5 × 6 mm flat-head screws.
Housing file and printed-order option coming soon- Prepare the cable. Use Divesoft TXD pin 4, GND pin 14 or 15, and switched 5V pin 13 if powering from the analyser.
- Wire the RX data line. Connect Divesoft TXD pin 4 directly to ESP32 GPIO4 RX. Do not put a 1k to 4.7k or 2k series resistor in the data line.
- Wire the module. Wire common ground everywhere, add the optional GPIO7 print button only if you want a separate hardware trigger, and add the optional RTC only for older analyser models without a built-in clock. Normally, printing is triggered by pausing the analyser.
- Flash the firmware. Disconnect the adapter completely from the Divesoft Trimix analyser before flashing. Then connect only the ESP32-S3-Zero by USB, open the installer in desktop Chrome or Edge, and choose full install for a new board. After flashing, unplug and reconnect USB power if the setup WiFi does not appear within 30 seconds.
- Enable analyser data output. On the Divesoft analyser select Menu > Preferences > Send Data to USB > On. Some versions call it Data output. Without this, the adapter can power up but show no live readings. See the official Divesoft He/O2 manual, section 12.
- Set up and test. Connect WiFi, pair the Niimbot printer, check live readings, and verify printed labels against the Divesoft display.
Cost before you install
Nitrox labels are basic. Trimix labels are Pro.
We do not sell the Divesoft analyser, ESP32 board, cable, printer, or finished adapter. You source and build the hardware. Basic Nitrox labels are free; Trimix label printing is the Pro upgrade, so know this before activating the adapter. Public checkout opens with the release in a few days.
No subscription. Helium/Trimix label printing, MOD/END output, and offline-capable signed activation.
Basic Nitrox label printing remains the plan. Trimix Pro checkout and activation will open after the production payment and firmware release flow are final.
USB flashing
The browser installer opens in a few days
Use update-only for existing devices so settings and licenses stay intact. Use full install for new boards, recovery, unknown firmware, or partition-layout changes. The public installer opens after the final release build and production payment flow are verified.
- Use desktop Chrome or Edge.
- Disconnect the adapter completely from the Divesoft Trimix analyser.
- Connect only the ESP32-S3-Zero to the computer by USB.
- Select Trimix Analyser Connector and the install mode.
- After flashing, unplug and reconnect USB power if the setup WiFi does not appear.
- Follow the release email when the installer is opened publicly.
Important safety note
The adapter copies readings from the Divesoft analyser and prints them. It does not make the gas analysis safer by itself. Always verify the analyser display, gas mix, date, MOD/END, and printed label before diving.